Agusta-Bell 206B RC Helicopter in Scale 1:5.7 of the Greek Army Aviation


Introduction

I have started this blog as an english-text alternative to a thread that I have opened in modelclub.gr (modelclub forum in greek) regarding my project to build an RC scale model of an Agusta-Bell 206B Jet Ranger II of the Hellenic Army (see unofficial site).


Now a few words about the project itself. The model is based on the fuselage provided by Vario (model 1004) in scale 1:5.7. There are very little differences between a Jet Ranger III (model kit) and an Agusta-Bell AB-206B Jet Ranger II that I needed for the project, so I decided to get the kit from Vario. The kit has been bought from one of the best specialists and professionals in the field, Mr Thomas Baumann who has helped me with making my choice of the model and its accessories (Helikopter Baumann). Thanks Thomas! I would also like to thank the team of eflight for their professional support not only for this construction but for all my RC models and accessories. In addition, I would like to thank the team from Innoflyer and especially Mr. Christophe Raible for the help with the lighting system and for letting me test a new CPL model before its official launch. I would like to add here the biwix.com RC helicopter store and Johnny Trolliet at my hometown Renens for his exceptional service, availability and prices!

The particularity of this project is that the mechanism that I fit in the fuselage is not the one from Vario but a modified Align T-Rex 700E (Align RC Helicopters). I will give here details on the way that this is done with diagrams, photos, tips and tricks. This will cover the first part. The flight tests of the modified T-REX 700E have been conducted at the RC model field in Dizy, Switzerland that belongs to the Dizy RC Modelling Group (GAM Dizy). Big THANKS to all the members of the Club for the great friendliness since the first day I started there and for their help with advice and tips!

The second part will be dedicated to the scale model itself. Some photos of the Greek AB-206B can be found on the internet but they do not cover all the details. More photos of the aircraft with the Greek colors may be requested in the forum of modelclub.gr where I have gotten most of them thanks to the team spirit and great friendliness of the members (THANKS^1000 dsamba!!!). In order to complete the photographic part of the project I managed to get my own photos of a Jet Ranger III. This has been made possible thanks to the courtesy of the people from Heli-Lausanne (Heli-Lausanne) who have immediately accepted my request to get there and take as many photos as I needed. A big THANKS to them too!!!
At the last phase of construction, I have got invaluable help for the dimensions of the AB-206B landing gear from Iraklis Karailidis. Many-many thanks to you Iraklis!

So after this short introduction I will start publishing the steps I have already taken and will take during this quite challenging project (at least for me, it is my first scale RC helicopter).

I hope that you will find this blog helpful if you have a similar (or the same) project as mine and you will enjoy it as much as I do!

Welcome!
Hellenicopter

22/11/2016

Back again from my "lab"!
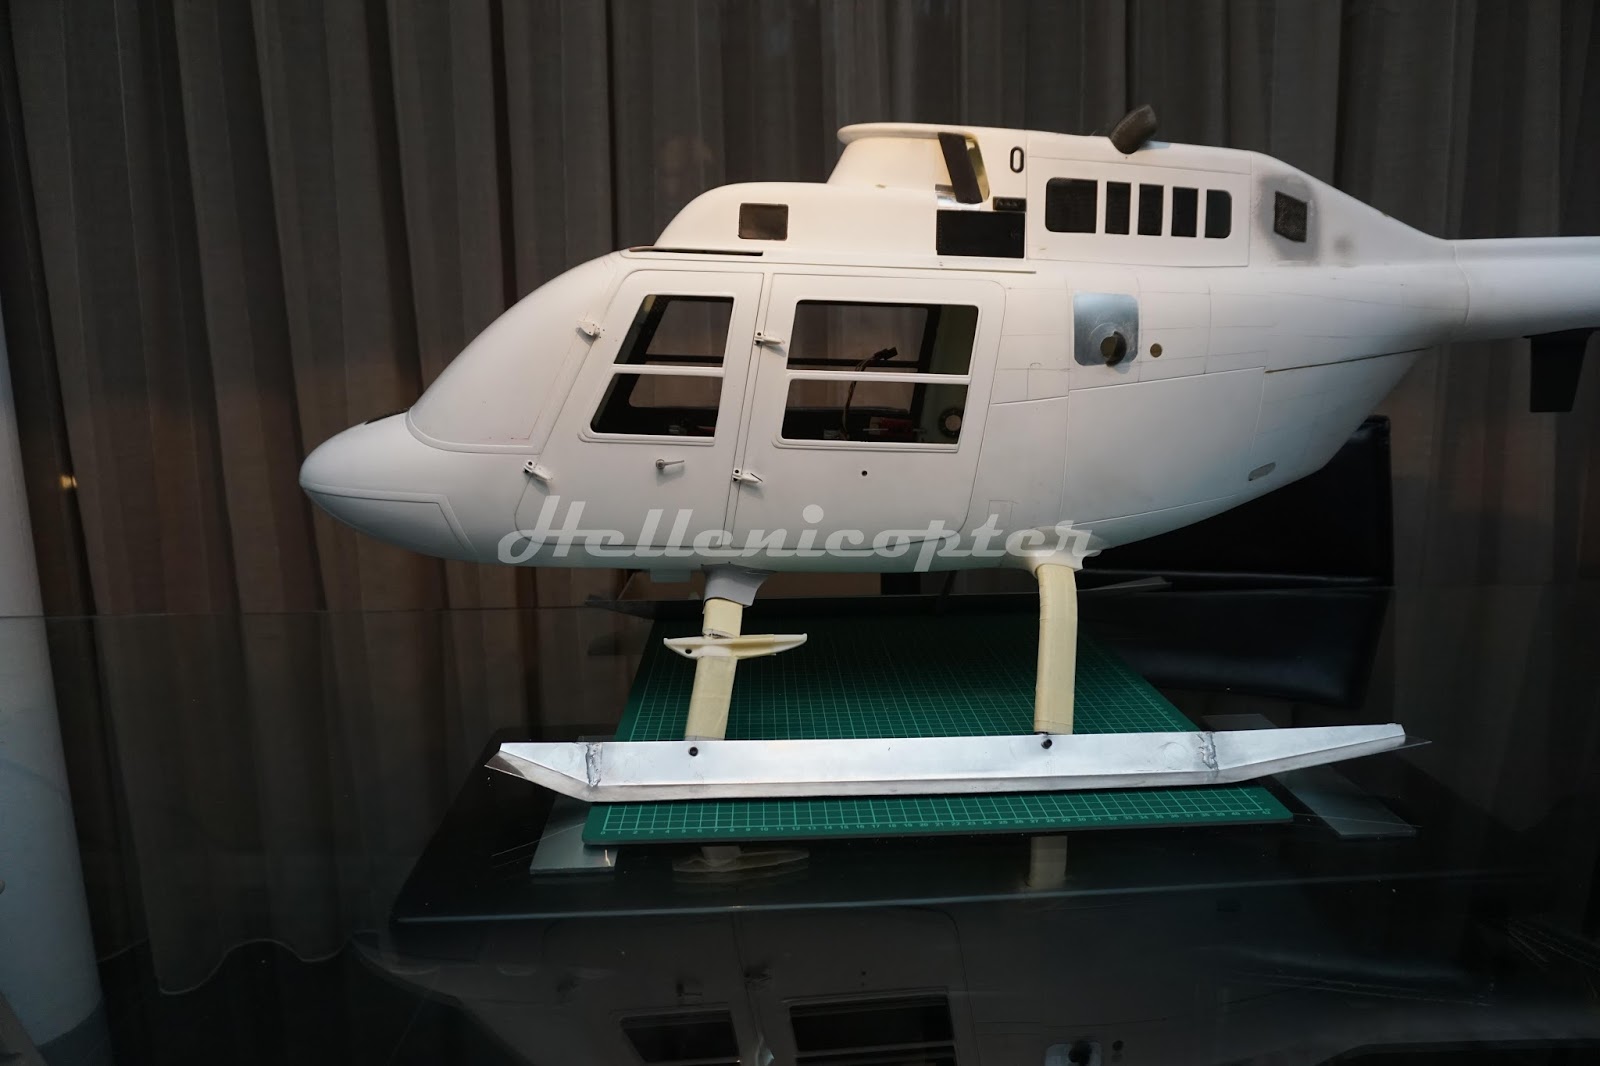
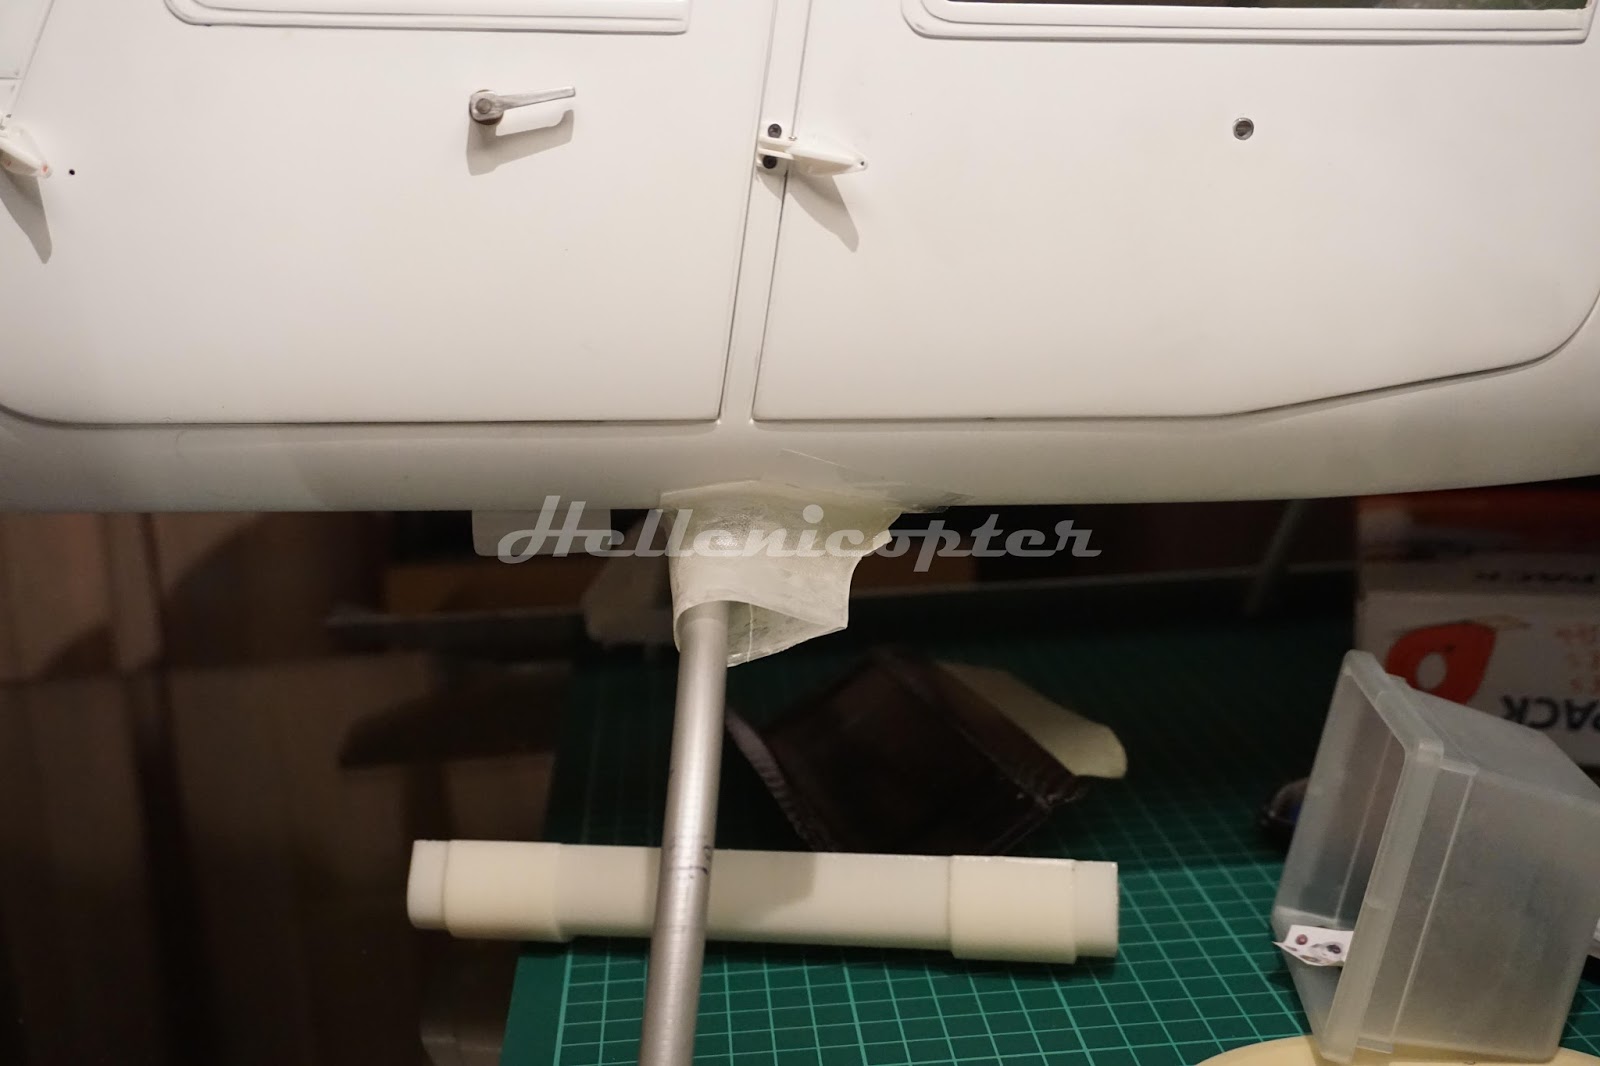
The rear crosstube cuffs masters are 3D printed and now I just have to make the fiberglass copies.

Once again I am more than happy to use Autodesk's Fusion 3D to do the job. The "sculpt" objects along with the mesh of the scanned fuselage worked like charm! And the software is free for a year for hobbyists like me and I can renew the license as long as I need it!

Here are the new photos.

Cheers,
Hellenicopter


20/11/2016

Test mount of the crosstube fairings, footstep and cuffs... Starts looking better already.


14/11/2016

 Hello,

A bit of news. The crosstube cuffs have been finished using fiberglass. The cover of the crosstubes at the front under the fuselage has been created with carbon fibers using a 3D printed piece designed from scratch (master printed with my new Zortrax M200 - this one is really a plug&play WYSIWYG 3D printer!!!). The piece is a bit bigger than I wanted (design problem, not a 3D printing problem) so I will have to make it again. As you can see I use vacuum in order to laminate some pieces like this. Still some retouches are needed on the piece but in general the result is very good (and thin!).

The construction moves faster now as I have managed to build the front cuffs. Now the rear cuffs must be made properly, but it should not take too long. Then a couple of small pieces to 3D print and the riveting will start. I hope that by January I will have a lot more to show here.

Cheers,
Hellenicopter


07/11/2016

Hi again after some weeks of "inactivity" on this blog. Inactivity is quoted because behind the scenes there has been a lot of work.
Below you can see some photos of the work done during the summer up until now. The landing gear has been done again from the beginning (both crosstubes and skids). I used 10mm full aluminum rods this time. The skids have been done again too. Then some work on small and bigger parts with CAD and my customized mUVe3D. Strobe cap, antenna, side maintenance step, Pitot tube, various covers, hanging jacks, 28V panel cover, crosstube access steps, rear light cap...
I have found a way to reproduce from photos the "Agusta Bell - Jet Ranger" label that should be put on both sides at the front of the aircraft. I had to 3D print the molds for the crosstube fairings that you see assembled below.
There has been a lot of work for the grid at the rear of the heli that it had to be perfectly fused with the body of the "hump" at the rear near the oil radiator. The grid comes from... my wife's kitchen and an old protective grid for pans like this one.


Below there is a special part that gave me headaches for months before I have finally managed to make it from scratch using Autodesk's Fusion 360 and T-splines. The part is the cuff that joins the crosstube fairing to the fuselage and its geometry is far from being trivial. The whole thing needs to fit both to the crosstube fairings and to the shape of the fuselage body. The result is two molds made of FunToDo Standard Blend resin with my mUVe3D DLP printer. It took around 2h with 100-micron z-resolution to print (total height ~4cm). The molds will be copied with silicon RTV and then the real covers will be made of carbon fiber like the fairings for the crosstubes (see pictures below).
I am really glad I managed to build 3D models of those cuffs because they have been the blocking points for weeks and I had really underestimated their complexity. Now I need to make the rear ones and laminate with carbon fibers. I hope that after that the heli build will accelerate a bit.

Cheers until the next update!