Agusta-Bell 206B RC Helicopter in Scale 1:5.7 of the Greek Army Aviation
Introduction
I have started this blog as an english-text alternative to a thread that I have opened in modelclub.gr (modelclub forum in greek) regarding my project to build an RC scale model of an Agusta-Bell 206B Jet Ranger II of the Hellenic Army (see unofficial site). Now a few words about the project itself. The model is based on the fuselage provided by Vario (model 1004) in scale 1:5.7. There are very little differences between a Jet Ranger III (model kit) and an Agusta-Bell AB-206B Jet Ranger II that I needed for the project, so I decided to get the kit from Vario. The kit has been bought from one of the best specialists and professionals in the field, Mr Thomas Baumann who has helped me with making my choice of the model and its accessories (Helikopter Baumann). Thanks Thomas! I would also like to thank the team of eflight for their professional support not only for this construction but for all my RC models and accessories. In addition, I would like to thank the team from Innoflyer and especially Mr. Christophe Raible for the help with the lighting system and for letting me test a new CPL model before its official launch. I would like to add here the biwix.com RC helicopter store and Johnny Trolliet at my hometown Renens for his exceptional service, availability and prices!
The particularity of this project is that the mechanism that I fit in the fuselage is not the one from Vario but a modified Align T-Rex 700E (Align RC Helicopters). I will give here details on the way that this is done with diagrams, photos, tips and tricks. This will cover the first part. The flight tests of the modified T-REX 700E have been conducted at the RC model field in Dizy, Switzerland that belongs to the Dizy RC Modelling Group (GAM Dizy). Big THANKS to all the members of the Club for the great friendliness since the first day I started there and for their help with advice and tips!
The second part will be dedicated to the scale model itself. Some photos of the Greek AB-206B can be found on the internet but they do not cover all the details. More photos of the aircraft with the Greek colors may be requested in the forum of modelclub.gr where I have gotten most of them thanks to the team spirit and great friendliness of the members (THANKS^1000 dsamba!!!). In order to complete the photographic part of the project I managed to get my own photos of a Jet Ranger III. This has been made possible thanks to the courtesy of the people from Heli-Lausanne (Heli-Lausanne) who have immediately accepted my request to get there and take as many photos as I needed. A big THANKS to them too!!!
At the last phase of construction, I have got invaluable help for the dimensions of the AB-206B landing gear from Iraklis Karailidis. Many-many thanks to you Iraklis!
So after this short introduction I will start publishing the steps I have already taken and will take during this quite challenging project (at least for me, it is my first scale RC helicopter).
I hope that you will find this blog helpful if you have a similar (or the same) project as mine and you will enjoy it as much as I do!
Welcome!
Hellenicopter
I hope that you will find this blog helpful if you have a similar (or the same) project as mine and you will enjoy it as much as I do!
Welcome!
Hellenicopter
24/06/2016
19/06/2016
After a year...
Almost one year of silence but for a reason. No time available!
In addition the 3D printer needed quite some work, especially the projector and the right filtering of the light in order to produce big-sized and high-definition pieces.
In addition the 3D printer needed quite some work, especially the projector and the right filtering of the light in order to produce big-sized and high-definition pieces.
Lots of pieces had to be redesigned from the beginning because more photos have been found on the internet and I found out that the dimensions and the shape were not so correct.
So here are some photos of new pieces. Soon I will assemble them on the helicopter and post new photos.
Crosstube covers made of carbon-fiber composite. The master has been printed with another 3D printer of a friend. Thanks Jean-Phi!


Below some photos of the fully redesigned footsteps based on some photos found on ebay for spare parts.


Now some pretty 3D-printed exhausts using my modified mUVe3D printer. They are printed as you see them right up and without a single support. The mechanics have worked in perfection!


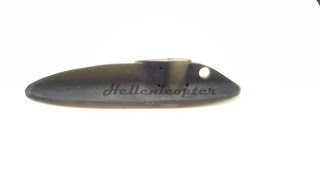
Below the re-printed big tail antenna. The shape of the base is rounded with Boolean operations on the 3D scanned surface of the model's tail boom using Autodesk MeshMixer.


30/07/2015
Quick release system for my customized mUVe 3D printer
OK, since I have been building a lot of parts for my heli using the customized mUVe3D DLP printer it deserves some time spent to show you a new idea I have for a quick release system of the building plate.
I have taken apart a Hama photo tripod "Traveller Duo 170" in order to use its head for the quick release system. After making some changes to the head (replacing the tightening screws/levers by short screws) and attaching it to the horizontal bar of the mUVe3D z-axis the system is ready to be tested. In fact, it is very useful to have full control of the tilt and swivel angles of the plate using the tripod head in order to fine tune the position of the plate.
Below you can find some photos. Once I test the system to build some parts I will post more photos.
Cheers,
Hellenicopter


14/05/2015
Changing an EC3/EC5 plug without destroying it
For some reason you may need to remove an EC3 or EC5 plug from your battery or your ESC and in general once the bush or the socket is clipped in it is difficult to get it off without ruining the plastic around or cutting the wire shorter.
I have found a relatively easy way to do that without destroying the plastic plug. Here's how:
Let's say you want to remove this wrongly installed plug from your Li-Po pack.
ATTENTION! REMOVE AND RE-INSTALL ONLY ONE CONNECTOR AT A TIME TO AVOID A POTENTIAL SHORT CIRCUIT!
Step 1: Use the corresponding connector (male/female) as an extension that will help to push out the socket.
Step 2: Use a powerful soldering iron (100W in my case) to heat the extension socket until you can feel the heat around the plastic plug and the battery cable.
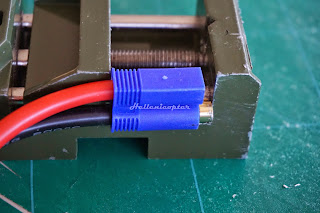
Step 3: Use a small vice (a Proxxon MS 4 here) to push the extension against the plastic and unclip the socket out of it.
Step 4: Pull the extension off the connector and separate them from the plastic plug.
Step 5: Do the same for the other connector and finally assemble them in the new plug. In my case I had to unsolder the male connector and replace it with a female one before re-installing it in the new plastic housing.
As you can see the blue plastic plug is almost intact after the operation and can be reused.
More to come on the Jet Ranger itself during the coming weekend.
Cheers,
Hellenicopter
Inscription à :
Articles (Atom)


